Now that I've finished collecting the exclusive Empyrean rewards, I can complete the game in a short 5-6 minutes.
I'd like to write an article about this because at first you don't know what's important and it often takes a lot of time depending on your choices.
Basic flow
Railjack is like a new frame that can change performance, weapons, and abilities. In the beginning, you will have to fight with turrets, so it will take a longer time.
Fighters: Use Railjack abilities to destroy them all at once.
↓
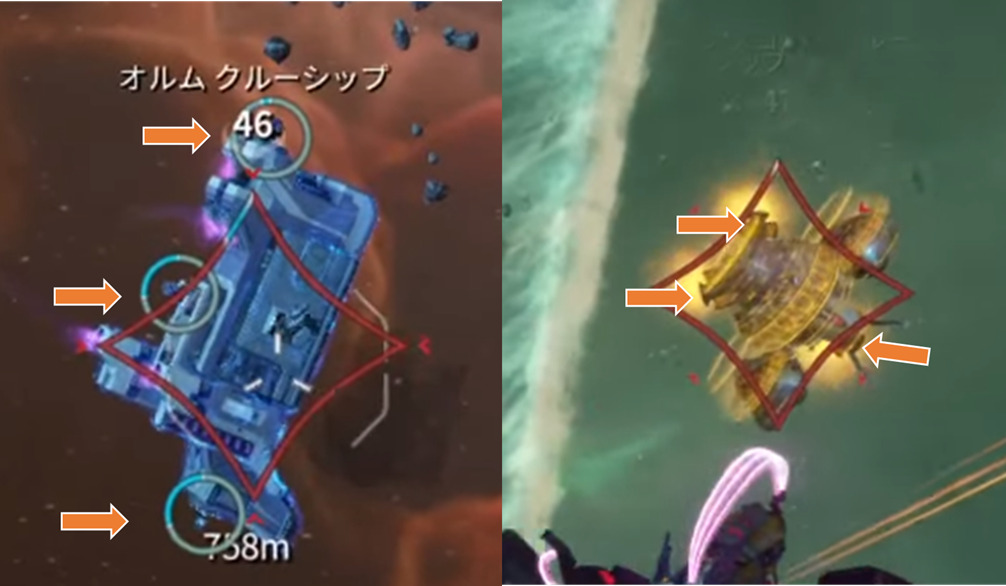
Crew Ship: Peel off the special invincibility state and shoot them down one by one with forward artillery.
↓
Any additional targets clear.
↓
Main targets clear.
Corpus territory: Exterminate, Defense, Orphix*.
Grineer territory: Assassination, Sabotage.
*The Orphic mission is the most difficult end-content, like defeating Eidolon. It requires a different approach, so I'll leave that for another time. After entering the main ship, you will be able to proceed to the next area even if you fail to defeat Orphics.
Get a full set of exclusive Emperian mission rewards!
Please see below for information on where to get the 11 exclusive rewards + 6 Permanent Primes that can be obtained by completing additional and main objectives.(As of Update 30)
Components
It's okay to start with what you have on hand. It's also fun to get things together little by little.Railjack equipment can be disassembled and the materials will be return.
Shield Array
| Components | Adopted | Factor | MK III Unique Trait |
|---|---|---|---|
| Shield Array | Zetki | Capacity Recovery speed Recovery delay | +25% Railjack damage while shield depleted |
Shield Gating* is a better way to prevent hull damage than increasing the Capacity of shields. Therefore, I use Zetki Shield Array for shortening the recharge delay. [Recommended].
*Shield Gating: If you have any shield left, you will not take any damage to your health even if you take heavy damage.
Engine
| Components | Adopted | Factor | MK III Unique Trait |
|---|---|---|---|
| Engine | Lavan | Basic speed Boost speed | +20% Top Speed while shields are depleted |
Emperian missions are rarely fought while avoiding movement, but rather either rushing to the destination or stopping to fight. For this reason, I focus on boosting speed.
Plating
| Components | Adopted | Factor | MK III Unique Trait |
|---|---|---|---|
| Plating | Lavan | Armor HP | not present |
In terms of effective HP (HP that accounts for armor), Laban is the most valuable.
Reactor
| Components | Adopted | Factor | MK III Unique Trait |
|---|---|---|---|
| Reactor | Zetki | Rail Jack Ability Strength Range Duration | 50% chance that a Fire Hazard will repair automatically after 5s |
Zetki: There is an automatic recovery from Hazards, which increases range and strength of the Railjack ability.
Armament
Nose Turret
| Armament | Adopted | MK III Unique Trait |
|---|---|---|
| Nose Turret | Zetki Photor [Recommended] | Heat damage +60%. |
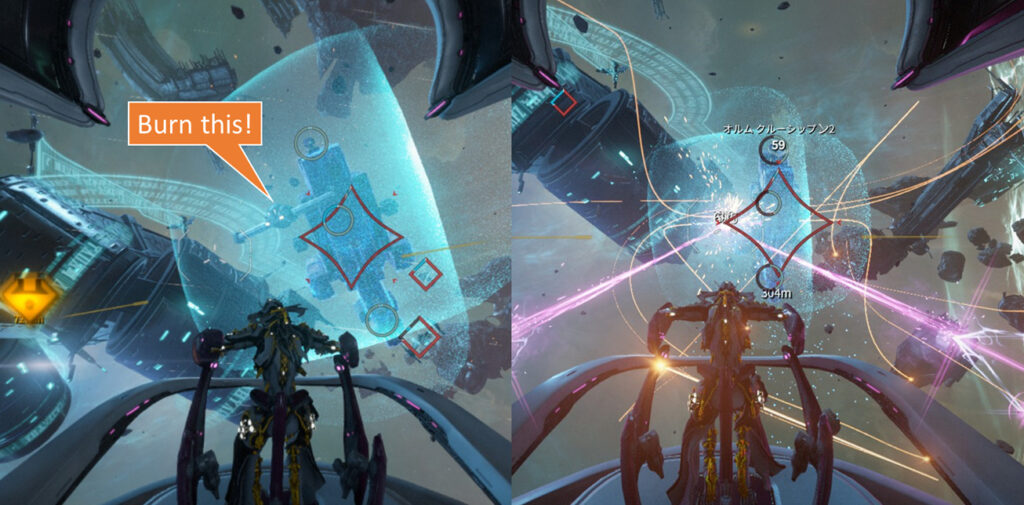
The Infinite punch-through allows you to burn the shield generator of the upper corpus crewship from the front. I use Zetki for Burst DPS.
Swivel Turrets
| Armament | Adopted | MK III Unique Trait |
|---|---|---|
| Swivel Turrets | Vidar Pulsar | Puncture damage +60%. |
I recommend the Pulsar, which has a three point burst on hit scan. The hitscan turret makes you less sensitive to distance and speed, and the NPC gunner will shoot down fighters with its highly accurate fire. The stab effect also lowers armor and increases forward artillery damage.
There are other hit scans, such as Photor (hold) and Taryn (spin up), but they don't work well with NPC gunners because they will "tap fire" any turret.
The Vidar is the most damaging and hardest to overheat.
Ordnances
| Armament | Adopted | MK III Unique Trait |
|---|---|---|
| Ordnances | Tycho Seeker(DOJO) | none |
It is developed by DOJO, so if you don't belong to it, you probably won't be able to rank up. But Shatter Burst and other combat abilities and turrets will be enough.
Plexus (Railjack Mod)
Integrated (passive bonuses)
Aura MOD
| Integrated | Adopted | Category | effects |
|---|---|---|---|
| Aura | Onslaught Matrix [Recommended] | Overall enhancement | increase to turret damage with 100% hull 20% chance to reflect damage when over 80% shields Battele mod efficiency. |
This is for energy saving purposes. When soloing, three NPC crew members are treated as having the same mod, saving 24%. The mod can be obtained easily from various fighters.
Regular MOD
| Integrated | Adopted | Category | effects |
|---|---|---|---|
| Regular | Conic Nozzle | Speed | Speed +25.5%. |
| Regular | Cruising Speed | Speed | In safe zone: Speed +100% |
| Regular | Ion Burn | Speed | Boost speed +45% |
| Regular | Artillery Cheap Shot [Recommended] | Forward Artillery | 60% chance of no consumption |
- Speed:It is much faster than moving with Archwing.
- Forward Artillery:It saves you the time to go to the forge when you run out of ammo. However, it can only be obtained from the Veil Fighter.
The remaining integration mod slots can be filled with turret MODs to assist the NPC gunner's firepower.
Battle (Railjack Abilities)
| 戦闘 | Adopted | effects |
|---|---|---|
| Defensive | Blackout Pulse [Recommended] | Disables the enemy.Damage 600, Range 200m Manual detonation by pressing twice: Range +50m |
| Offensive | Shatter Burst [Recommended] | Cluster bomb, damage 6,000, range 200m, duration 5s Can be detonated manually by pressing twice. |
| Super | Seeker Volley | Homing 25 missiles, explosion damage 3,000 |
Defensive:Blackout Pulse
- You can deactivate a wide range of crew ships and fighters, and shoot them down instantly by getting into their forward artillery. This will prevent them from unexpectedly emitting healing bubbles or launching ram threads.
- This is easy to obtain because it comes from the A reward (yellow target) of Saturn, Neptune, and Pluto Proxima.
Offensive:Shatter Burst
- You don't need to use the Tycho Seeker, which takes a long time to charge and lock on, to destroy the invincibility shield generators of the higher level crew ships.
- By firing it and manually detonating it immediately, you can take down the fighters surrounding you at a lower cost than with the Seeker Volley.
- Shrinks the healing bubble emitted by the Greenia crew ship.
- This is easy to obtain because it comes from the A reward (yellow target) on Earth and Venus Proxima.
Super:Seeker Volley
- No matter if the enemy is far or near. Whether it's an elite few or a group. The myriad of missiles will track and shoot them down powerfully.
- There is no need to aim. However, due to the high energy cost and the travel required to get to Veil, the other two are enough in the beginning.
Tactical (Support Abilities)
| Tactical | Adopted | effects |
|---|---|---|
| Defensive | Breach Quanta | temporarily stalls a hull breach 45s |
| Offensive | Battle Stations | Turret damage +65%, duration 26s |
| Super | Void Cloak | Transparency + low speed 30%, duration 35s |
Defensive:Breach Quanta
- The mod description doesn't make it clear at all, but it stops the 60-second countdown of the Catastrophic Hull Breach for 45 seconds, which makes you invincible for 105 seconds.
- Common drop from a Vale fighter.
Offensive:Battle Stations
- This slot is not necessary equipped.
Super:Void Cloak
- This is useful for damage reduction when heading into a forge or forward artillery.
Intrinsics(Player's ability)
The following is a list of the most useful ones, but since the cost doubles with each rank, you can evenly distribute them without worrying.It is a requirement of entry for each proxima, and when the Intrinsics value of any of them reaches 7, you can enter all the way to the veil.
Intrinsics about Archwings, Necramechs, and Air supports are not listed here, but they apply even outside of Emperian missions. You can use them to increase your speed and attack power , etc. so it's a good idea to go through Emperian missions for that purpose.
Tactical
| Rank | Ability | Description | Remarks |
|---|---|---|---|
| 3 | Command Link | Fast Travel within vessel. Coordinate squad members with command interface. | Instant access to each facility from the tactical map. I can do it all by myself… |
| 4 | Recall Warp | Omni gear can be used to warp aboard the ship from anywhere. | This is useful in situations where you have to go between outside and inside the target. |
| 6 | Tactical Efficiency | Reduces Energy Consumption for Battle Mods by 25%. | Together with Aura Mod, it can reduce energy consumption by 49%. |
Piloting
| Rank | Ability | Description | Remarks |
|---|---|---|---|
| 1 | Boost | Hold LShift to boost Engine Speed. Firing pilot guns interrupts boosting. | Navigation speed is important for comfort. |
| 2 | Vector Maneuver | Tap LShift to burst Directional Thrusters. | A short press while boosting will make it more faster. |
| 5 | Boosted Scavenger | Increase loot pickup radius by 3x while boosting, drifting, or dodging. Hidden derelicts are marked. | The hidden ruins will be displayed at the start of the game, and you can use them to find emperian equipment for B rotation rewards! |
Gunnery
| Rank | Ability | Description | Remarks |
|---|---|---|---|
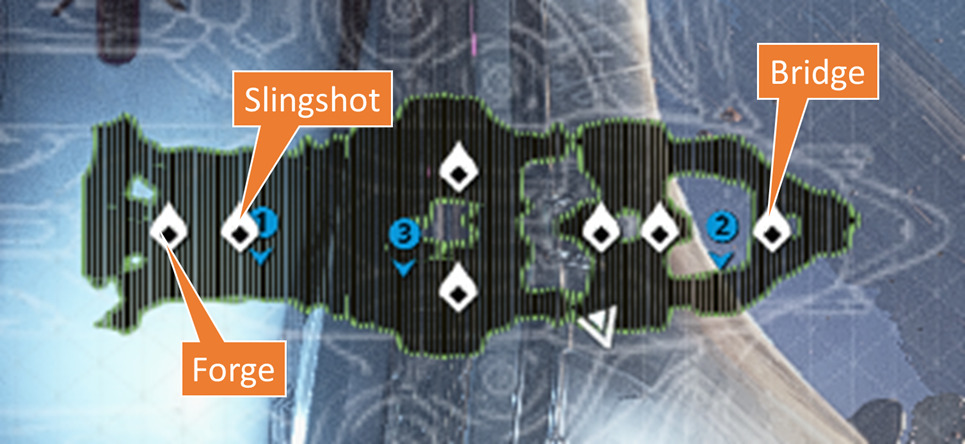
| 3 | Archwing Slingshot | High velocity Archwing deployment into the combat zone. Slingshot Archwing damages fighters and penetrates enemy crewship hulls. | Dynamic boarding to enemy territory within 2km! I use this a lot when I'm a squad member. |
| 9 | Flush Heat Sinks | Reloading when weapons are overheated will cool weapons to 0 in 0.5 secs. | It almost cancels out the demerit of Artillery 10. |
| 10 | Reflex Aim | Aim snaps turrets to the nearest lead indicator for 3s but the Turret overheats 20% faster. | Hit scan turrets are guaranteed to hit. It is said that the superheat rate is a disadvantage, but it is not a problem since you can use Gunnery 9. If there is a problem, it's that you use a lot of points first on turrets that you don't use very often (lol). |
Engineering
| Rank | Ability | Description | Remarks |
|---|---|---|---|
| 4 | Dome Charge Forge | Resupply forward Artillery cannon during combat. | At the beginning of missions, there are only two forward artillery rounds, so you will need this to replenish them.If you don't have one of these, you will need to board Crew ships. |
Command
| Rank | Ability | Description | Remarks |
|---|---|---|---|
| 1 | 1st crew member | Unlocks the first crew member slot and the ability to hire them from Ticker. | Employing one repair engineer at the beginning will make you much more comfortable. As you move up the ranks, you can have up to three. |
| 2 | Competency Gain | Allows you to give 1 competency point to your crew members. | Allows you to adjust the Competency of your crew. You can use 3 points when you rank up, and you can reset them. |
Crew (NPC members)
- First, hire a technician. As long as the technician is active, you can leave the hazard and operate.In the beginning, it is a good idea to have two engineers or a defender. In the beginning, it is a good idea to put two engineers or one of them as the defender. If one of them goes down, the survivors will revive one another.
- As players join, they will be replaced by the NPC crew on the right, so set the most important technicians on the left.
- For placement, I use Engineer, Gunner, Gunner, or Engineer, Defender, Gunner, etc.You can change their roles from the tactical map in the middle of a mission.
- Let the engineers and defenders have good, reinforced weapons.Mods will also have their effects unless they require an activation action.
- Turned liches can only be assigned to defense. It cannot be revived. However, they will be 5 to 6 times tougher.
| Role | priorities | Assessment |
|---|---|---|
| Pilot | Pilot the railjack | Not required. "Where are we going?" |
| Gunner | Operation of Swivel Turrets. | These are high precision auto-aimers. If you have a good turret on board, the fighters will be exterminated while you are dealing with the crew ship. As long as there are enemies outside the ship, they will not join the ship's interior defense. |
| Engineer | Repair of inboard hazards | Employ the highest priority.It will reduce the need for repairs and prevent fatal hull damage in your absence. They will not join the ship's defense until repairs are completed. |
| Defender | Eliminate intruders | If you want to eliminate intruders instead of repairs, or if you want to bring in Converted Kuva Liches. |
Frames that work well with Emperian missions
Since the rail jack ability uses frame energy, the following is recommended.
- GARUDA:You can convert your health into energy immediately. Restore your health with Magus Elevate.
- PROTEA:The energy recovery of 3rd ability, which continues during the maneuver, is comfortable.
- With the combination of Equilibrium and Synth Fiber mods, health orbs can also be used for energy. If you have Arcane Energize, you can increase your recovery even more.
- The Helminth system allows you to transfer the 3rd ability to other frames and you can do this on almost all frames.
- LAVOS:Has no energy, and has a 10-second cool time system like the frame abilities.
- HILDRYN:Has no energy and consumes shields.
- Shield cost is 10 times the default.You can comfortably use abilities continuously except for 100 energy ones like Seeker Volley.
- Other:Energy recovery is also possible with Erergy Gear and Forge.
In my case, I often go on extermination missions in Corpus territory with a MESA that has PROTEA 3rd ability implanted. The priority is on sweeping speed.
I often go to skirmishes in Grinia territory with OCTAVIA, which is also a PROTEIA 3rd ability transferred, and it is comfortable because OCTAVIA's ability will continue even after getting off the railjack, and invisibility is not removed. Skirmishes do not require combat like normal Sabotage.


Comment